
Mortal Shell 2 Hall of Murmurs: Location and Loot
Find the Mortal Shell 2 Hall of Murmurs entrance below Castigator’s Keep, raise the elevator, and collect 750 Coins, Laterite, and the Foul Knight’s Gloom.
What is the Hall of Murmurs in Mortal Shell 2?
Current route guides place Hall of Murmurs in a short optional dungeon beneath Castigator’s Keep in the Outskirts of Mammon. The entrance is in the southern part of the region, south of the Outskirts of Mammon Beacon, and the dungeon is reached through a courtyard pit or the stairs leading underground. The reported reward set is 750 Coins, one Laterite, and the Gloom dropped by the Foul Knight. For the six-fragment collection route, use the Mammon Map Fragments guide.
You do not need to clear Hall of Murmurs to advance the story. There is no boss, chest, or trap inside, and the layout is compact enough to finish in one visit. The only encounter that can surprise you is the kneeling figure beside the fireplace, which becomes hostile when you take the Laterite.
How to reach Castigator’s Keep from the Outskirts of Mammon
Reach the Outskirts of Mammon before looking for the dungeon entrance. The route into this part of the map requires enough Ova to cleanse the corruption blocking Marrow Keep’s second jump pad. Once that pad is available, use it to travel to the Outskirts of Mammon Beacon.
From the beacon, follow the bridge that begins at the blasted gate. Cross the bone gate and stay on the main road until Castigator’s Keep comes into view. Activate the beacon on the keep’s gate battlement before searching the interior.
The Hall of Murmurs is south and southwest of the Castigator’s Keep Beacon. The area can look like part of the keep’s ordinary ruins, so search the central section and the courtyard instead of expecting a large dungeon sign. The map below shows the marked Hall of Murmurs location in relation to the keep and the surrounding paths.
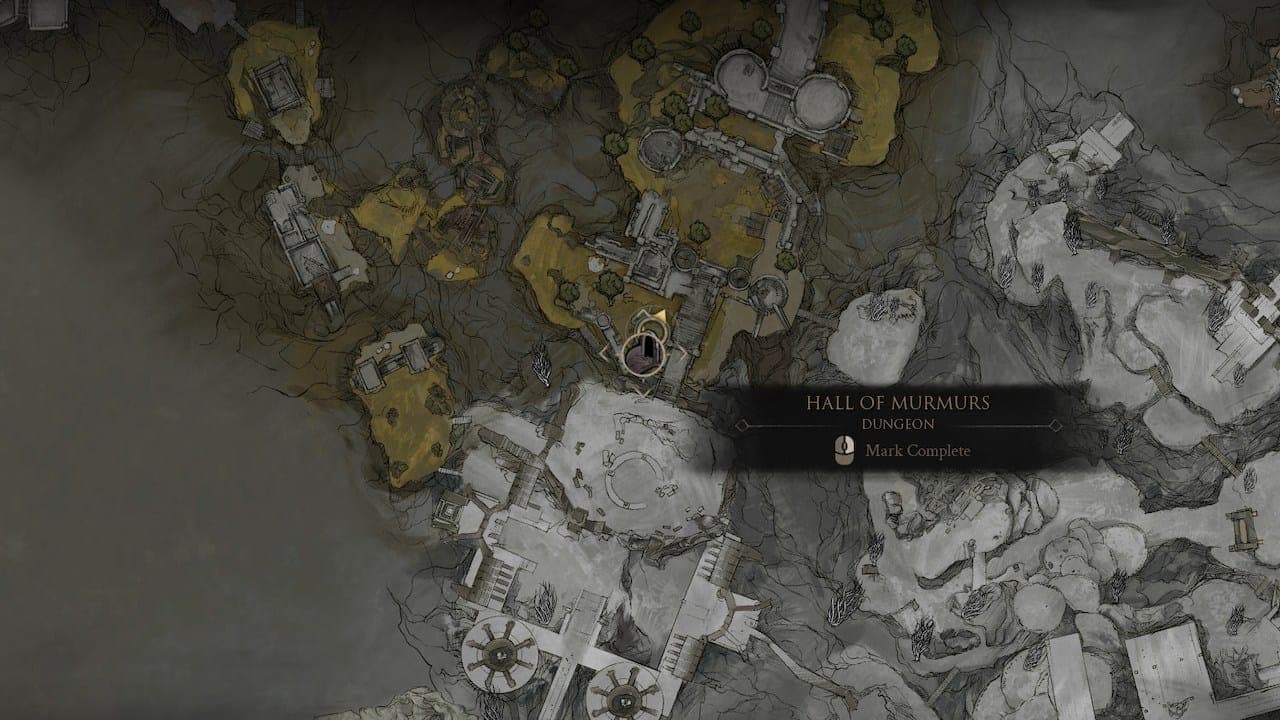
Where is the Hall of Murmurs entrance?
Move through the keep’s central area and continue past the courtyard. Near the Grisha Hunter camp, look for stone stairs descending into the ground. Another view of the same approach is a circular pit in the stone courtyard south of the beacon, which is the opening you use to enter the dungeon.
The entrance is easy to pass because it resembles a minor passage rather than a formal gate. If you have reached the keep but cannot find the dungeon, return to the beacon’s courtyard and check the ground-level opening before circling farther into the fortress. Once you drop through the pit, the route becomes much more direct.
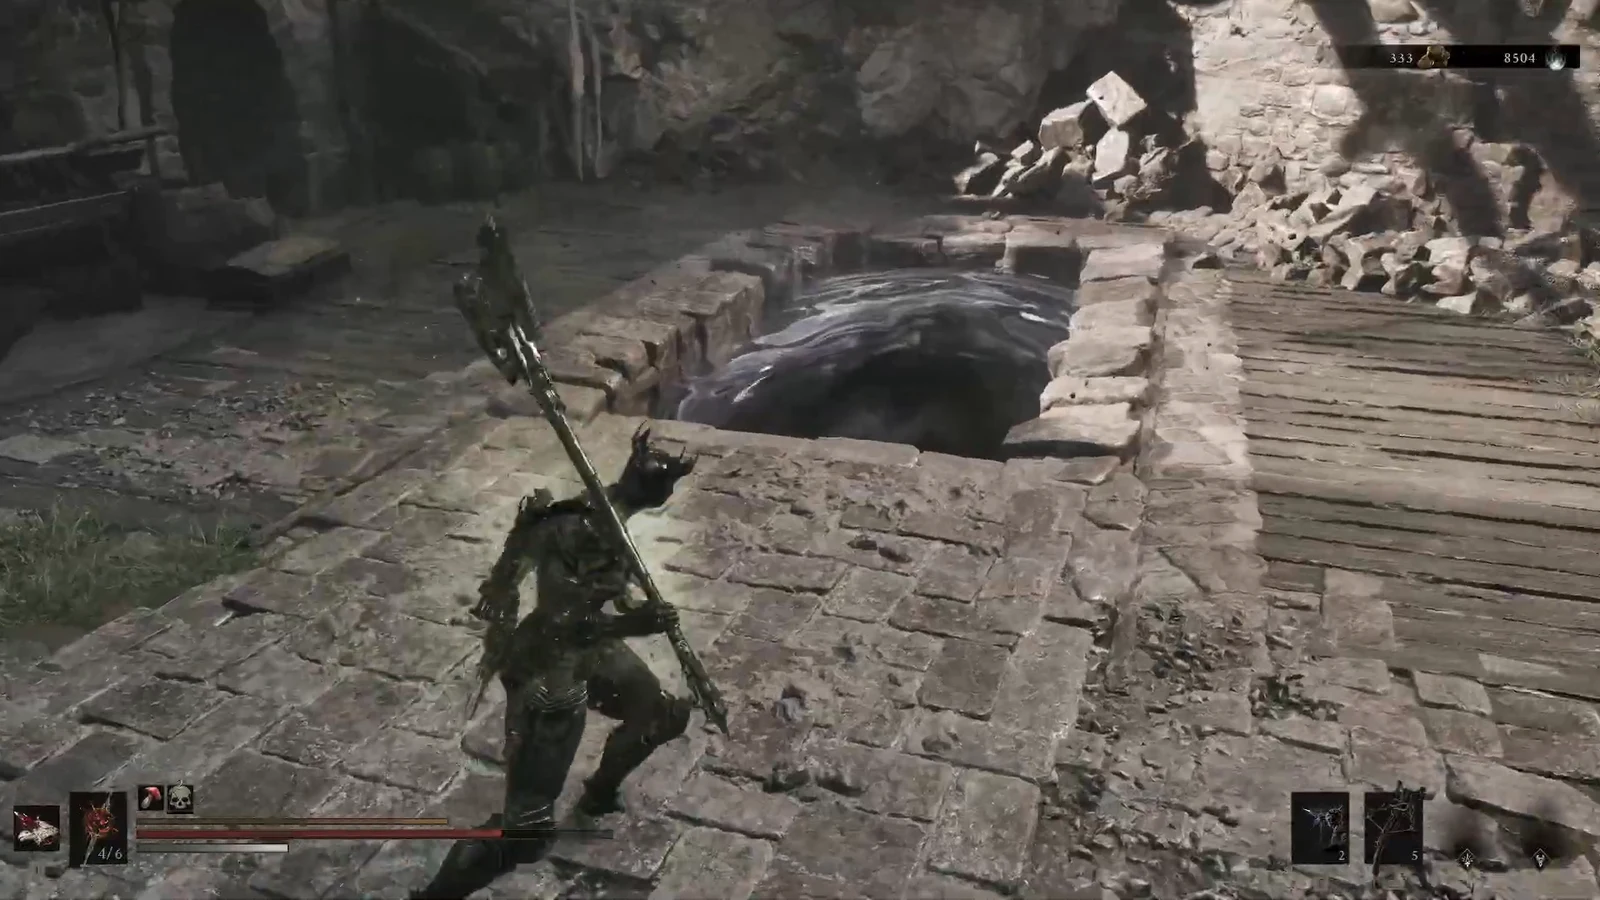
How to clear the dungeon route
Follow the opening corridor after you drop in. The path is mostly linear, and the first enemies are Shielded Brigands. Heavy attacks are the important tool here because two of the early enemies carry shields that can only be broken by heavy attack; the corridor is short, so clear them before moving toward the wooden door.
When the path appears to end, check the right side instead of turning around. A lever there raises the elevator and opens the route forward. Pull it, ride the elevator down, and clear the next room before breaking through the wooden door on the opposite side.
The door leads to the final chamber and its fireplace. The room contains the two Coin pickups and the Laterite, while the kneeling figure beside the fire remains passive until the material is taken. Treat the fireplace as the trigger point for the last fight, then leave through the route you used to arrive.
Where to find every Hall of Murmurs reward
The reward route is simple once you enter the final room. Take the 500-Coin pouch from the caged box to the left of the doorway, then collect the 250 Coins behind the first pouch. These two pickups give 750 Coins in total, and both are in the same compact section of the chamber.
The Laterite is in the fireplace beside the kneeling enemy. It is a forge material, so taking it also activates the encounter that completes the room. The exact Gloom amount from this fight is To be confirmed, but the Foul Knight is the source of the Gloom drop.
The safest order is to collect the Coins first and prepare your attack before taking the Laterite. The figure changes into a Foul Knight with a long neck and tentacle-like arms as the trigger resolves. Defeat it, pick up its Gloom, and make one final sweep of the room so no Coin pouch is left behind.
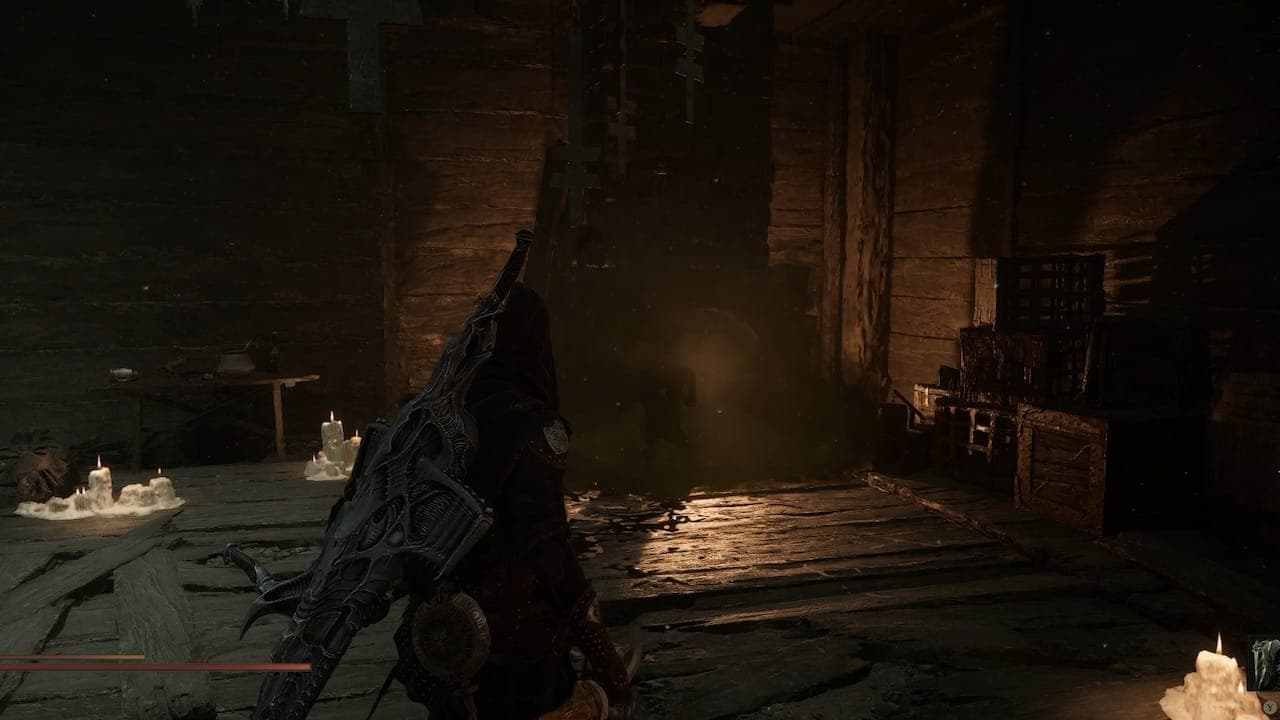
Why does the kneeling enemy suddenly attack?
The figure by the fireplace does not attack when you first enter the room. Picking up the Laterite is the trigger that makes it hostile, so the transformation is tied to the loot rather than to a hidden conversation or a separate quest. Have your character facing the enemy before interacting with the material so the first attack does not catch you out of position.
The transformed enemy is the Foul Knight. Its long neck and tentacle-like arms make it more dangerous than the weaker enemies in the entrance corridor. Finish the fight before returning to the doorway, then collect the Gloom that appears after the defeat.
Is there a boss or hidden secret in Hall of Murmurs?
There is no boss in this dungeon. The area has five ordinary enemies, no chests, no traps, and no extra reward route beyond the two Coin pickups, the Laterite, and the Foul Knight’s Gloom. The ominous name does not lead to a sound gimmick, illusory wall, or button puzzle.
Egon is also separate from Hall of Murmurs. The NPC connected to the Feed Me trophy is in the keep’s central tower, while the dungeon contains the Foul Knight encounter. Egon accepts Gloom, and that currency is different from the Coins found in Hall of Murmurs, so clearing the dungeon does not progress his interaction.
What should you do after clearing Hall of Murmurs?
Once the two pouches, the Laterite, and the Foul Knight’s drop are collected, the dungeon is complete. There is no additional chamber or story sequence waiting beyond the final room. Walk back to the entrance and continue exploring Castigator’s Keep or the wider Outskirts of Mammon.
You can also postpone Hall of Murmurs without losing a progression-critical event. Its optional status makes it a good short detour while you are already at the keep, especially after activating the beacon. If your build shows a different trigger or reward behavior, that final-build variation is To be confirmed.
Related Articles
combat
Mortal Shell 2 Enemies and Encounter Combat Tips
Review Mortal Shell 2 enemies shown in gameplay and learn how posture, Harden, shields, sidearms, and careful spacing shape encounters.
combat
Mortal Shell 2 Gloom Farming: Uses, Recovery and Upgrades
Learn what Mortal Shell 2 Gloom is used for, how death recovery works, and what the official Week 1 update changed without an invented farming table.
combat
Mortal Shell 2 Harden Mechanic and Combat Guide
Learn how the Mortal Shell 2 Harden mechanic protects one exchange, creates Break Damage opportunities, and fits beside parry, dodge, and Resolve.
Was this helpful?
Thanks for the feedback!