
Mortal Shell 2 Eredrim the Venerable Guide
Mortal Shell 2 Eredrim the Venerable guide with his unlock route, Break Damage abilities, Slaughterer mechanics, builds, beta limits, and current route notes.
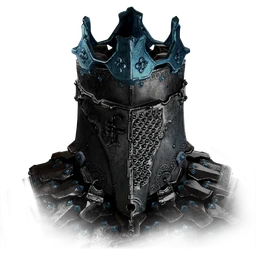
Mortal Shell 2 Eredrim the Venerable is obtained in the Citadel of Penance. The route leads through the area to The Warden, and interacting with Eredrim’s corpse after the fight gives access to his Shell memory. His combat style centers on Break Damage, Riposte rewards, and a finisher for enemies at low health.
How to get Eredrim the Venerable
The main route starts around Gloomshade Grove. A walkthrough sends you to the lake southeast of the Gloomshade Grove Beacon, where the Bloodcursed Lithopod drops the Citadel Gate Lever. Use the lever at the Citadel of Penance entrance, then activate the area Beacon before returning toward the central part of the dungeon.
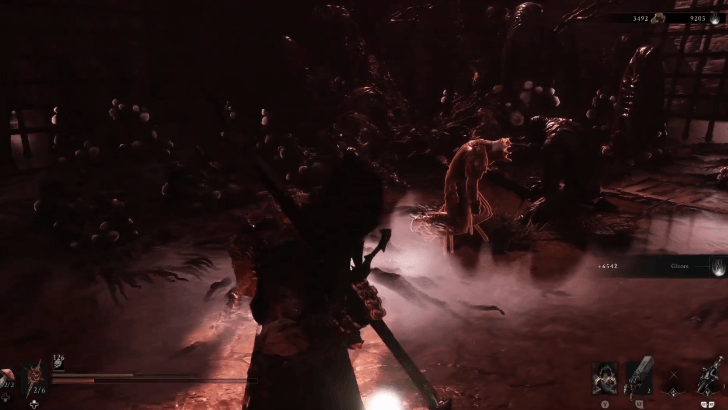
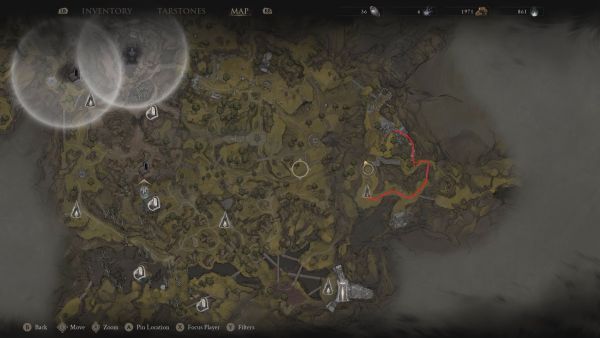
From there, drop to the lower levels and use the elevator on the right to reach the upper floors. The Warden appears when you approach the interactive object in the open area at the top. Defeat The Warden, then interact with Eredrim’s corpse in the arena to play the memory and obtain the Shell.
The alternate route
An alternate route near the One-Legged Wolf Tavern uses an object at the ruins south of the tavern to teleport the player to a cell near the elevator leading toward The Warden. This route skips the Bloodcursed Lithopod encounter and can still leave the nearby Beacon available before the boss fight.
The tavern, Citadel of Penance, elevator, and Warden connection are the stable route landmarks. The precise object position and any change in the current client are To be confirmed.
Eredrim abilities
Shoulder Bash charges Eredrim forward into an enemy and deals Break Damage. It is the direct entry tool in his kit, useful for interrupting or pressuring targets before returning to normal attacks. A final damage value, cooldown, range, or universal stagger result is To be confirmed.
Ethereal Diapason smashes Eredrim’s Diapason and sends a shockwave through the surrounding area. The ability is described as dealing Break Damage to enemies in range, which gives him an area pressure option for groups. The number of targets, final radius, and retail damage values remain To be confirmed.
Executioner finishes enemies at low health and connects with Eredrim’s Riposte mechanic. Performing a Riposte grants Slaughterer stacks in the ability descriptions. The stacks are removed when Eredrim rests or is severed, so the benefit rewards an uninterrupted route and should not be treated as a permanent bonus.
What the Shell skill tree adds
The first skill group improves Shoulder Bash, Executioner, and Eredrim’s resistance to Frost. Later groups add more Break Damage, stronger shockwaves, splash damage after an execution, and Stasis effects after enemies are broken by Ethereal Diapason. The final group improves the armor and timing around Riposte and gives Seal related benefits.
The displayed skill details disagree on several displayed upgrade values and on a few level descriptions. The names and broad effects are consistent enough to explain the intended playstyle. Exact percentages, stack counts, damage values, and final retail skill behavior are To be confirmed.
What build style is described for Eredrim
The community builds describe Eredrim as a close range Shell for players who like heavy attacks, Break Damage, and Riposte timing. One build uses the Great Martyr’s Blade with a Frost setup so frozen enemies take increased damage in the build. Another community build favors the Axatana and uses Shoulder Bash as the main way to keep enemies under pressure.
These are community recommendations from a specific version. They show two workable directions rather than a confirmed best build. The best weapon, Seal, Tarstone combination, boss matchup, and final balance are To be confirmed.
How Slaughterer changes a route
Slaughterer is easiest to understand as a momentum mechanic. Ripostes build the stack count, and Executioner gives Eredrim a way to finish weakened enemies. If you rest or become severed, the descriptions say the stacks are lost, so a player who wants to keep the bonus needs to manage Beacons and risky encounters carefully.
The combat testing also describes a high stack count as an execution threshold against low health targets. That claim comes from build testing rather than an official balance table. Keep the execution idea as a practical lead, while the exact cap, threshold, and boss interaction remain To be confirmed.
How to practice Eredrim
Start with ordinary enemies that telegraph attacks clearly. Use Shoulder Bash to learn its approach distance, then look for a Break opening or a Riposte before spending the rest of the encounter on normal attacks. Once an enemy is near the Executioner condition, check how the current build presents the finisher instead of assuming the beta behavior is unchanged.
For a build comparison, use the same weapon and upgrade state across several Shells. Eredrim fits a durable pressure role with strong Break Damage and a stack mechanic that resets on rest or severing. His final health, speed, damage scaling, and retail tier position are To be confirmed.
What to verify at the Citadel
Confirm the route landmarks in order. The useful checks are the Gloomshade Grove Beacon, the Bloodcursed Lithopod or the tavern shortcut, the Citadel Gate Lever, the elevator, and The Warden’s arena. After the fight, the corpse interaction is the step that connects the boss encounter to Eredrim’s Shell memory.
The route and ability descriptions establish Eredrim’s location and core playstyle, but not a final developer walkthrough or complete retail balance sheet. Any changed route, missing prompt, or different skill value should be recorded as a new version result and marked To be confirmed.
Related Articles
combat
Mortal Shell 2 Enemies and Encounter Combat Tips
Review Mortal Shell 2 enemies shown in gameplay and learn how posture, Harden, shields, sidearms, and careful spacing shape encounters.
combat
Mortal Shell 2 Gloom Farming: Uses, Recovery and Upgrades
Learn what Mortal Shell 2 Gloom is used for, how death recovery works, and what the official Week 1 update changed without an invented farming table.
combat
Mortal Shell 2 Harden Mechanic and Combat Guide
Learn how the Mortal Shell 2 Harden mechanic protects one exchange, creates Break Damage opportunities, and fits beside parry, dodge, and Resolve.
Was this helpful?
Thanks for the feedback!