
Mortal Shell 2 Lazlo the Justiciar Guide
Mortal Shell 2 Lazlo the Justiciar guide with the Royal Crypt route, Retribution heat cycle, armor defense, skills, build options, and current limits.
Mortal Shell 2 Lazlo the Justiciar is obtained in the Royal Crypt of Mammon. The route leads below the High Lord’s Keep and through the Vellen, High Lord of Mammon encounter before Lazlo’s memory and Shell become available. His combat loop is built around armored defense, Heat, and Retribution shockwaves.
How to get Lazlo the Justiciar
The Royal Crypt of Mammon is described as a southern or lower map area beneath the High Lord’s Keep. One route uses the Bone Gate north of the Gate of Mammon to reach the area. Another walkthrough approaches the crypt from the southwest, defeats Vellen, and follows the torch lit path through the dungeon.
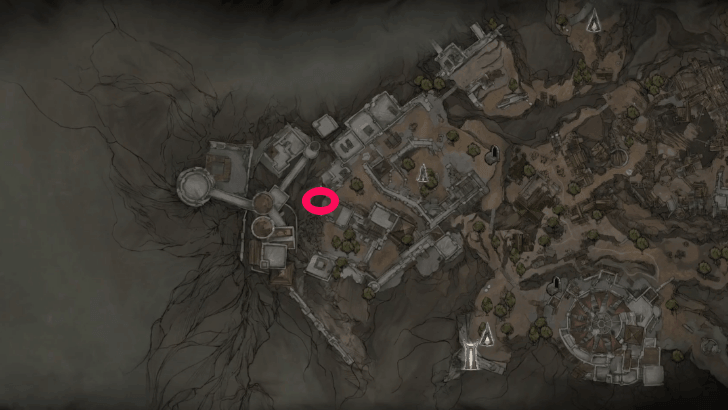
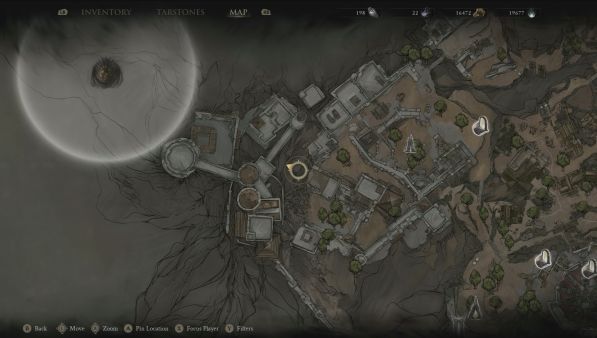
Continue through the Royal Crypt until the route reaches Lazlo’s Shell. The route says Vellen is Lazlo’s uncle and protects the area as a boss. After the encounter, play through Lazlo’s memory to obtain the Shell. The exact room order and final client route are To be confirmed if the map changes between builds.
How Retribution builds Heat
Retribution heats Lazlo’s armor and releases a shockwave around him. Repeated use raises the Heat Meter, and the descriptions say that Overheat triggers a stronger shockwave with Burn stacks. After the Overheated shockwave, Lazlo’s armor is temporarily disabled, creating a cycle between protection, pressure, and a vulnerable cooldown.
Fortified Plate gives Lazlo a base 10% damage reduction while his armor is active. That effect explains why the community the build treats him as a durable Shell. Armor is still a state that can be lost, so the Heat cycle matters more than simply pressing Retribution whenever Resolve is available.
What the Heat skill tree adds
Warmed Up makes Lazlo stronger as the Heat Meter rises. The current version describes more damage, more Resolve from melee attacks, and extra damage reduction at higher Heat. Incandescence refills part of the Heat Meter when armor returns from cooldown, which can shorten the time needed to reach another Overheated shockwave.
Adaptation reduces the armor cooldown. Temperament improves the shockwave’s damage or radius and can make an Overheated wave ignite the ground. Breaker adds Break Damage, while Furnace punishes enemies that strike Lazlo at full Heat and adds another defensive effect in the skill text.
What happens after Overheat
Overheat is a deliberate trade. The larger shockwave can spread Burn and create room against groups, then armor goes on cooldown and Lazlo loses the protection attached to it. Rush gives him Warp and critical related benefits while armor is down in the skill tree, which gives the player a reason to keep attacking during that interval.
Inflamed changes how the Heat Meter behaves and can make later Overheated shockwaves more efficient. Rekindle adds health or Resolve recovery as Heat drains. Detonation creates a final shockwave when Lazlo is severed, though the community pages describe these failure focused upgrades as less central to normal play.
What build style fits
The builds describe a heavy, low maintenance style that trades hits while armor and Heat are active. One build uses the Veteran’s Battleaxe because it offers a cleaving moveset and can be infused with Burn. Another build uses the Clockwork Scythe and spends Resolve to increase attack damage, relying on Lazlo’s mitigation and Resolve gain to support that setup.
Those weapons are community recommendations from testing. The ability entry supports the Heat, armor, shockwave, and Burn themes, while it does not declare a single best weapon or Tarstone arrangement. Final damage reduction, weapon synergy, boss performance, and balance are To be confirmed.
How to manage Resolve and armor
Retribution is the main reason to reserve Resolve on Lazlo. Melee attacks can help refill the resource through Warmed Up, while the armor cooldown creates time for normal attacks and movement. Use the early shockwaves when they solve a positioning problem, then decide whether reaching Overheat is safe in the current arena.
The moment the armor disappears is the clearest transition in the fight. Rush and the melee bonuses in the skill tree can support an aggressive answer, while Adaptation can bring the armor back sooner. Do not treat the Heat Meter as permanent protection because the pages consistently describe a cooldown after the Overheated state.
How Lazlo handles groups and bosses
Retribution gives Lazlo area pressure and Burn, while Breaker can add Break Damage to the shockwave. A full Heat Meter can punish enemies that attack into the armor, so groups that stay close may create their own risk. Against a boss, the player has to learn when the Overheated shockwave is worth the armor cooldown.
The build description shows strong mitigation and high health in its tested version. It does not provide a final official health ranking or a universal boss strategy. Exact health, cooldown, damage, and fatal blow behavior are To be confirmed.
How to practice Lazlo
Begin with one enemy and watch the Heat Meter after each Retribution use. Note the difference between a normal shockwave and the Overheated version, then practice attacking during the armor cooldown without spending every Resolve point. This makes the rhythm visible before a crowded fight adds more variables.
For equipment testing, keep the same Heat state and compare a melee weapon with a ranged option. The current game version supports a bruiser identity with shockwave control and strong armor uptime. The final skill order, Tarstone priorities, and release version values remain To be confirmed.
What the Royal Crypt confirmation confirms
The route is tied to the Royal Crypt of Mammon, the Vellen encounter, and Lazlo’s memory. The core kit is tied to Retribution, Heat, Overheat, Burn, and Fortified Plate. Those facts answer the main location and ability questions without needing an invented quest name or reward.
The pages contain differences in route wording and several skill level values. Keep the stable landmarks and broad mechanics, then attach any exact number to the build or version that displayed it. A changed route or mechanic is To be confirmed until a current page supports it.
Related Articles
combat
Mortal Shell 2 Enemies and Encounter Combat Tips
Review Mortal Shell 2 enemies shown in gameplay and learn how posture, Harden, shields, sidearms, and careful spacing shape encounters.
combat
Mortal Shell 2 Gloom Farming: Uses, Recovery and Upgrades
Learn what Mortal Shell 2 Gloom is used for, how death recovery works, and what the official Week 1 update changed without an invented farming table.
combat
Mortal Shell 2 Harden Mechanic and Combat Guide
Learn how the Mortal Shell 2 Harden mechanic protects one exchange, creates Break Damage opportunities, and fits beside parry, dodge, and Resolve.
Was this helpful?
Thanks for the feedback!