
Mortal Shell 2 Enemies and Encounter Combat Tips
Review Mortal Shell 2 enemies shown in gameplay and learn how posture, Harden, shields, sidearms, and careful spacing shape encounters.
Available gameplay shows grotesque creatures, armored threats, shielded opponents, and large encounters. A few names appear in gameplay details, including Wormfish, Solnir Stillblade, and the Arbiter. Many designs remain unidentified, and no reliable page provides a complete full-game bestiary.
What enemy types are confirmed?
The strongest confirmed description is functional rather than numerical. Creatures are shown or described as movement and spacing threats, armored enemies test attack selection, shielded enemies can respond differently to ranged pressure, and large opponents demand pattern reading. This classification helps you prepare without pretending that every silhouette has a final name.
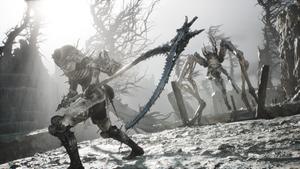
The gameplay also shows a hammer staggering targets, a hand cannon damaging body parts, and repeated crossbow shots damaging or breaking shields. These reactions suggest that weapon choice matters against defenses, but they do not establish a universal counter or final damage table. Exact enemy weaknesses and weapon effectiveness are To be confirmed.
Which named enemies appear in the route?
Wormfish is identified as a returning creature seen in the shattered world. Solnir Stillblade is described as a first revealed boss encounter, and the Arbiter appears in separate boss-focused gameplay coverage. These names are useful anchors for the gameplay, but their complete move sets, rewards, and full-game locations are not documented in the route.
Do not treat every creature shown in a trailer as a confirmed boss or named enemy. The page itself separates confirmed details from expectations and warns that several designs remain unidentified. A complete enemy list, boss order, exact arena route, and final encounter status are To be confirmed.
How does posture help against enemies?
The official Steam description says players can exploit multiple tactics to shatter enemy posture and strike critically. Combat guides connect a posture break with a vulnerable opening for a critical attack or riposte takedown. This makes posture a separate combat goal from simply reducing an enemy’s health.
Use safe attacks to learn how the enemy reacts, then choose heavier pressure, a parry, a sidearm, or a compatible Tarstone when the opening is clear. The official pages confirm the system direction but do not publish a complete posture-value table. Exact stagger thresholds, hit counts, and boss posture requirements are To be confirmed.
When should you use Harden?
Harden is the safest response when an enemy’s attack is dangerous and a clean dodge or parry is not available. The current game version describes it as a defensive tool that turns the Harbinger into stone and absorbs incoming pressure, while also warning that it has a cooldown. Save it for a committed strike, a difficult approach, or a moment when the terrain leaves little room to move.
Do not assume Harden solves every enemy mechanic. The routes disagree on details such as costs and bypass rules, and no complete official exception list is present. Use the current game build response for grabs, multi-hit attacks, ranged effects, and special boss moves; any universal rule is To be confirmed.
How should you handle armored and shielded enemies?
Armored opponents reward patience and attack selection. Heavy attacks can create posture opportunities, while a shield may prevent a direct light-melee approach from producing a safe opening. The gameplay specifically shows repeated crossbow fire damaging or destroying shields, so ranged pressure is a documented route to test against shield defenses.
Keep your distance long enough to see whether the shield is weakening, then commit only after the enemy’s recovery. Do not assume that every armor type shares the same weakness or that a crossbow always breaks every shield. Enemy-specific counters and final shield rules are To be confirmed.
How do you approach large enemies and bosses?
Large enemies can make attacks easier to recognize while making mistakes more costly. Stay in open space, watch the range of sweeping attacks, and identify the recovery animation before committing to a long combo. The boss details emphasize timing, reaction, spacing, and resource awareness rather than simply racing health.
Start a new encounter with a short observation phase. Classify the threat by movement, defense, range, and recovery, then choose whether to pressure posture, use Harden, or wait for a parry. The complete boss roster, elemental chart, reward table, and final difficulty order are To be confirmed.
Do Tarstones change enemy matchups?
The route guides describe Tarstones as a way to add weapon infusions and status effects, with compatibility depending on the weapon. The official descriptions also confirm extensive upgrades and sidearms, so Tarstones belong to the broader preparation system rather than being a universal answer to every enemy. Check the current weapon entry before spending a stone or resource.
Avoid repeating exact durations, damage multipliers, or resistance charts from unsupported community pages. Those figures are not corroborated by The official store description in the current game version. The final Tarstone effects and enemy-specific status interactions are To be confirmed.
Enemy encounter checklist
Scout the arena, identify the attack pattern, and check for nearby enemies before attacking. Use the correct pressure tool for the defense you see, keep Harden for a dangerous commitment, and convert a posture break only when the area is safe. If a name, weakness, drop, or number does not appear in a reliable version-labelled page, mark it To be confirmed instead of filling the gap.
How should you read an unfamiliar enemy?
Begin with the movement that starts the exchange. A target that closes quickly asks for space and a short response, while an armored or shielded target asks you to test which attacks cause a visible reaction. The gameplay supports this practical reading because it shows different defenses reacting to different weapons, yet it does not provide a complete matchup chart.
Watch one full attack cycle before committing to a long combo. Note the reach, the number of swings, the recovery, and whether another enemy can enter the same space. Then choose one response and repeat it. This method gives you usable information without turning a trailer silhouette into a named bestiary entry.
What remains unknown about the bestiary?
The current version does not establish the final number of ordinary enemies, mini-bosses, bosses, or variants. It also does not confirm a complete set of health values, elemental weaknesses, drops, or area assignments. Wormfish, Solnir Stillblade, and the Arbiter remain useful names from the current game version, but a name alone does not supply a full encounter profile.
The official game descriptions confirm a compact interconnected world, Shell possession, weapon upgrades, and posture-focused combat. They do not publish an enemy database. Treat community lists and gameplay labels as leads that need a build, location, and reproducible behavior before they become confirmed page data.
Related Articles
combat
Mortal Shell 2 Gloom Farming: Uses, Recovery and Upgrades
Learn what Mortal Shell 2 Gloom is used for, how death recovery works, and what the official Week 1 update changed without an invented farming table.
combat
Mortal Shell 2 Harden Mechanic and Combat Guide
Learn how the Mortal Shell 2 Harden mechanic protects one exchange, creates Break Damage opportunities, and fits beside parry, dodge, and Resolve.
combat
Mortal Shell 2 How to Parry Combat Guide
Learn the Mortal Shell 2 how to parry routine through attack tells, posture pressure, Harden as a fallback, careful riposte openings, and safer practice.
Was this helpful?
Thanks for the feedback!