
Mortal Shell 2 Boss Guide: Routes and Fights
Use this Mortal Shell 2 boss guide for posture breaks, parries, Harden, Ripostes, route checkpoints, and the official Week 1 boss changes.
The Mortal Shell 2 boss guide starts with posture and route planning. Bosses use the same core actions as regular enemies, including parries, Harden, dodges, Shell abilities, and Riposte openings, while their attacks carry higher stakes. The complete retail roster, exact phases, rewards, and final order are To be confirmed when sources disagree or rely on community previews.
What changed in the official Week 1 boss update?
The official August 29 Week 1 update says most bosses received a polish and bug-fix pass. It names changes for encounters including the Monolith, Zmey, the Lost Child, Droeg, Sir Isaac, Hexapod, Orrem, the Warden and Urrig, Vrannic, Magdalena, Bloodcursed Lithopod, Tainted Vestige, and the Wandering Shepherd. It also makes Riposte damage scale with enemy health and keeps its invulnerability window consistent.
These notes confirm update targets, not a complete Boss bestiary or a required order. Use the named encounters as a current patch reference, then verify the arena, phase behavior, reward, and route in the build you are playing.
How boss progression is described
The location guide divides encounters across Fainweald, Mammon, six Corrupted Gate dungeons, and The Unfound Path. It says major gate bosses provide Ova and that a Beacon appears in the arena after the encounter. This route structure is useful for understanding why exploration and boss progress are linked.
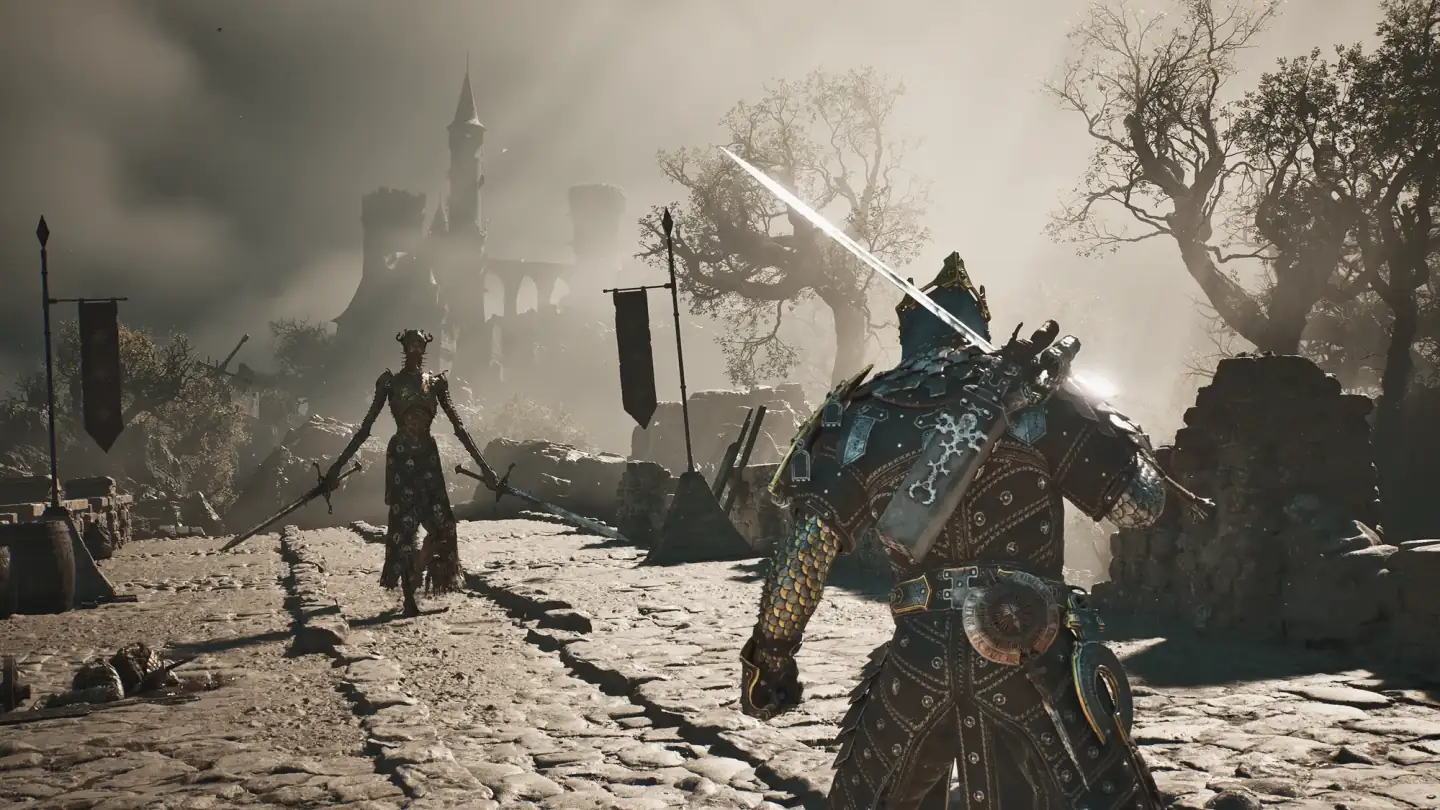
The same route description places the prologue Tar Golem on a scripted route. It says the health bar can be depleted for an achievement while the cutscene outcome remains the same. Exact achievement requirements, Ova amounts, and final route gates are To be confirmed.
Break posture before chasing damage
The official game description describes combat without a stamina gauge and emphasizes posture breaks and critical attacks. A boss guide from community routes says attacks, parries, blocks, Shell abilities, and Tarstones can all add break pressure. The practical goal is to read a safe attack, add pressure, and use the opening when the boss becomes vulnerable.
Do not copy unsupported damage ranges from the boss pages. Several pages include precise thresholds and recommended levels without an official matching table. Use those figures only as To be confirmed leads and base your current attempt on the enemy reaction visible in your build.
When to parry and when to Harden
Parry attacks with a readable forward commitment and use the success to build break pressure. Harden is a safer answer when the attack is too fast, the arena is crowded, or the next hit would otherwise interrupt your recovery. Dodge when the move is unlisted, delayed, or clearly unsafe to block.
The best answer changes with the boss phase. A move that is easy to read early can become faster or gain an area effect later, so keep one defensive option available after every punish. The exact parry windows and phase changes for individual bosses are To be confirmed.
Optional and hidden encounters
The boss hub separates false gods, guardian bosses, optional or hidden encounters, and dungeon bosses. This classification helps with route decisions because a player pursuing the main campaign may skip some fights, while a completion run will need to revisit side paths. A named enemy should not automatically be called a final boss or a mandatory encounter.
The official Xbox product description includes more than 80 dungeons and several hidden fights, yet that scope statement does not establish one complete official bestiary. Treat names, rewards, and difficulty rankings as version-specific. Confirm the encounter label in the current game before publishing a fixed all-boss count.
A dependable preparation routine
Before entering an arena, spend Gloom at a Beacon when the route allows it and keep the weapon and Seal you already understand. Test whether the boss reacts to your preferred attack, whether a sidearm creates space, and whether Harden can cover the move that kills you most often. Change one variable per attempt so you know what improved the result.
If the arena allows a Shell spirit ally, the route says Glimpse can be spent to summon one. The description also notes Glimpses affect Shell Bond, so avoid treating the resource as free. The exact summon rules and value for every boss are To be confirmed.
How to learn a wall fight
Spend the first attempt watching one combo and its recovery. On the next attempt, practice one parry or dodge, then add a light attack only when the timing is stable. When the posture bar approaches a break, stop chasing damage and prepare for the Riposte opening.
This method keeps the fight tied to visible actions instead of invented numbers. A boss guide is useful when it tells you which movement to watch and what the game displays after success. Final no-hit routes, universal best Shells, and boss weaknesses remain To be confirmed unless the confirmation supports them.
How large is the boss and encounter scope?
The current Xbox product page describes more than 80 dungeons. That is a world-size statement and does not mean the game has more than 80 bosses. The Steam page and community boss guides do not provide a publisher-approved count for bosses, mini-bosses, optional encounters, or variants.
Community pages provide useful categories such as story encounters, dungeon fights, optional fights, and Shell-related encounters. Those categories help organize a route, yet they are not a complete Bestiary. Keep a named fight in the confirmed section only when the entry gives enough context to identify its behavior, location, or route.
What belongs in a verified boss note?
Write down the encounter name, the area, the attack that creates the clearest opening, and the response that worked in the build. If the page gives a phase change or posture interaction, keep that detail tied to the page rather than adding a health threshold. A combat demonstration can show combat rhythm, but it cannot by itself prove a full attack table or reward list.
This standard also helps with future updates. A new retail patch may change a weapon, Seal, Tarstone, or boss reaction without changing the world route. Record the platform and build whenever a strategy changes, then mark unresolved names, drops, weaknesses, and final encounter order To be confirmed.
How should you organize a boss route?
Start with the area and the route condition that brings you to the encounter. Keep story fights, optional fights, dungeon fights, and Shell-related encounters in separate notes. The current game version uses those categories, but they do not prove that every community label matches an official game category.
For each fight, record the Beacon, the room or landmark, the first attack you can read, and the recovery that creates a safe opening. Add a platform and build when a strategy depends on a patch. This produces a route guide that can be updated without pretending that an incomplete name list is a final Bestiary.
What should you do when a boss name conflicts?
Check whether the name comes from an official store description, a version-labelled client, a community route, or a title. A community page can offer a useful route or attack idea while still using a different name from another page. Preserve the conflict until the current game version resolves it.
Do not infer a boss from a large enemy shown in gameplay. The enemy guide distinguishes broad encounter types and warns that many designs are unidentified. Boss identity, health, drops, phase order, and reward conditions are To be confirmed when the page does not give enough confirmation.
Related Articles
combat
Mortal Shell 2 Enemies and Encounter Combat Tips
Review Mortal Shell 2 enemies shown in gameplay and learn how posture, Harden, shields, sidearms, and careful spacing shape encounters.
combat
Mortal Shell 2 Gloom Farming: Uses, Recovery and Upgrades
Learn what Mortal Shell 2 Gloom is used for, how death recovery works, and what the official Week 1 update changed without an invented farming table.
combat
Mortal Shell 2 Harden Mechanic and Combat Guide
Learn how the Mortal Shell 2 Harden mechanic protects one exchange, creates Break Damage opportunities, and fits beside parry, dodge, and Resolve.
Was this helpful?
Thanks for the feedback!