
Mortal Shell 2 Perfect Guard Timing and Guide
Learn the Mortal Shell 2 Perfect Guard concept through attack commitment, posture pressure, Riposte openings, Harden fallback, and version limits.
Mortal Shell 2 Perfect Guard is the precise defensive timing that turns an incoming attack into posture pressure. The combat guide connects a successful timing window with a break opportunity and a later Riposte or critical attack. There is no reliable single frame value for every enemy, so exact timing is To be confirmed.
What Perfect Guard changes
The combat descriptions explain a Perfect Guard as tighter than a normal defensive response and more rewarding when it lands. It can shatter a meaningful part of an enemy’s posture and move the fight toward a vulnerable state. The official game description confirms the wider posture and critical attack relationship without publishing a complete timing chart.
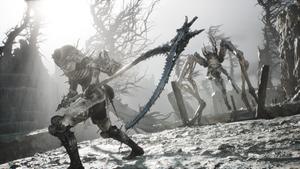
Treat the name as a practice target rather than a promise of one universal input. A slow overhead strike, a fast close slash, and a projectile can each present a different read. The current game’s animation and hit reaction should be the final reference.
Read the attack before pressing
Watch for the moment the enemy stops moving toward you and commits to the strike. Press the guard or parry input close to the impact instead of reacting to the first wind-up frame. A successful response should give a visible hit reaction or posture change that you can use to confirm the timing.
Begin with standard enemies whose attacks have clear rhythm. The routes warn that ranged attacks and boss moves can behave differently, and exact frame claims in community pages are not independently verified. Keep those values To be confirmed.
Perfect Guard and posture breaks
The game’s posture system lets repeated attacks, parries, blocks, and some Shell or Tarstone effects build toward a break. A Perfect Guard is valuable because one defensive success can also move the enemy toward that opening. When the break occurs, prepare for a Riposte instead of adding an unsafe extra swing.
Do not assume that one Perfect Guard always breaks a target. The current game version does not provide a final posture table for every enemy or boss. Weapon, Seal, Shell, attack type, and difficulty can change the result, so compare only like-for-like tests.
Perfect Guard versus Harden
Use Perfect Guard when the attack is familiar and the reward is worth the risk. Use Harden when the timing is uncertain, the arena is crowded, or taking one hit would end the attempt. The Harden guide describes it as a one-hit defensive option, while the Perfect Guard route aims for stronger posture progress.
The two actions can support the same fight. Harden can keep the player alive while learning a new attack, and Perfect Guard can take over once the attack rhythm is understood. Exact resource costs, cooldowns, and follow-up windows are To be confirmed.
Recover after a miss
A missed Perfect Guard should not become a panic chain. Move backward against slow enemies, Harden the next hit when there is no safe dodge, or leave the range of a second attacker before trying again. The advice recommends resetting the engagement instead of pressing another uncertain input.
Record the attack that caused the miss and whether its timing changed during a phase transition. A boss can add a delay, a second hit, or an area effect later in the fight. Any fixed boss frame table in the current game version is To be confirmed.
A simple practice routine
Choose one enemy and watch three attacks without pressing anything. On the next attempt, practice one Perfect Guard against the clearest move, then repeat until the hit reaction is consistent. Add one light attack after the reaction and stop before the enemy’s next pattern.
Only after the basic timing is stable should you test a Seal, Tarstone, or Shell ability. This keeps the lesson tied to the visible attack rather than a guessed stat advantage. Final frame counts, universal best enemies for practice, and retail balance are To be confirmed.
How does a Perfect Guard create an opening?
The combat details connect a well-timed guard with enemy posture pressure and a possible Riposte. That means the reward arrives in the next exchange, after the attack has been answered. Do not press several attacks immediately because the enemy may still be able to continue the sequence or another target may enter the arena.
Use the first successful guard to observe the reaction. Check whether the posture bar changes, whether the target staggers, and whether the game displays a separate takedown prompt. The current game version supports the broad relationship, but exact break amounts and guaranteed follow-ups are To be confirmed.
Can every attack be Perfect Guarded?
No complete attack table is available in the confirmation. The current version focuses on melee timing and use Harden or movement as alternatives when an attack is too fast, delayed, ranged, or difficult to read. That does not prove that every projectile or special move is impossible to guard.
Treat each new move as a test. Start outside the attack range, watch the full animation, and try one guard with Harden ready for the next attempt. Record a confirmed exception only when the current game displays a clear result. Final enemy coverage and boss-specific rules are To be confirmed.
When should you stop testing?
Stop a guard experiment when the arena becomes crowded or the enemy changes phase. A successful timing against one move does not make the next move safe, and a long Riposte animation can be interrupted by another target. Reset the space, restore a readable distance, and return to the same attack later.
For a useful note, keep the attack cue, result, Shell, weapon, Seal, and build together. The current game version supports Perfect Guard as a high-value defensive timing, but the complete window, break response, and retail balance are To be confirmed.
How is Perfect Guard different from a normal defense?
The combat guide uses Perfect Guard for a high-value defensive timing that can create posture pressure and a Riposte opening. Harden and dodge remain separate answers because they solve different spacing problems. A guard attempt should therefore be judged by the attack cue and the result displayed by the current game, not by a single community number.
Start with a direct melee strike and keep the target in front of you. If the guard succeeds, watch the posture response before adding another input. If it fails, let the enemy finish the sequence and reset. The current version does not confirm that every boss attack, projectile, or area effect can be Perfect Guarded.
What should you record while learning?
Write down the enemy name if it is confirmed, the attack description, the distance, and whether the attempt produced a stagger or break response. Add the Shell, weapon, Seal, and build number when you begin comparing results. This turns a personal timing observation into a useful version-labelled note.
Avoid publishing a fixed frame table from one clip. The page list includes community timing claims, yet it does not provide a complete official table for every enemy. A final frame window, boss exception list, and universal Perfect Guard route are To be confirmed.
Related Articles
combat
Mortal Shell 2 Enemies and Encounter Combat Tips
Review Mortal Shell 2 enemies shown in gameplay and learn how posture, Harden, shields, sidearms, and careful spacing shape encounters.
combat
Mortal Shell 2 Gloom Farming: Uses, Recovery and Upgrades
Learn what Mortal Shell 2 Gloom is used for, how death recovery works, and what the official Week 1 update changed without an invented farming table.
combat
Mortal Shell 2 Harden Mechanic and Combat Guide
Learn how the Mortal Shell 2 Harden mechanic protects one exchange, creates Break Damage opportunities, and fits beside parry, dodge, and Resolve.
Was this helpful?
Thanks for the feedback!